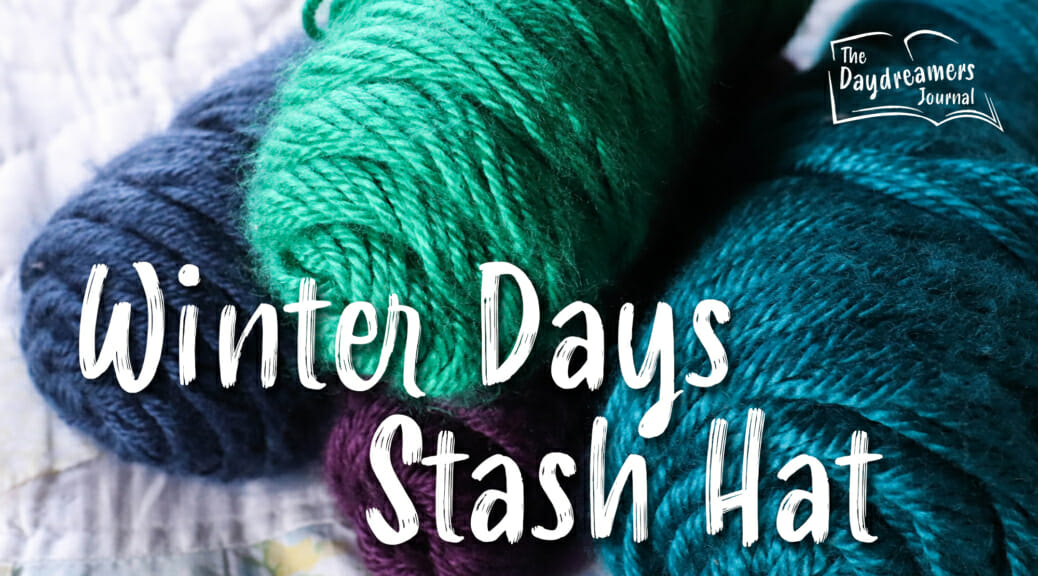
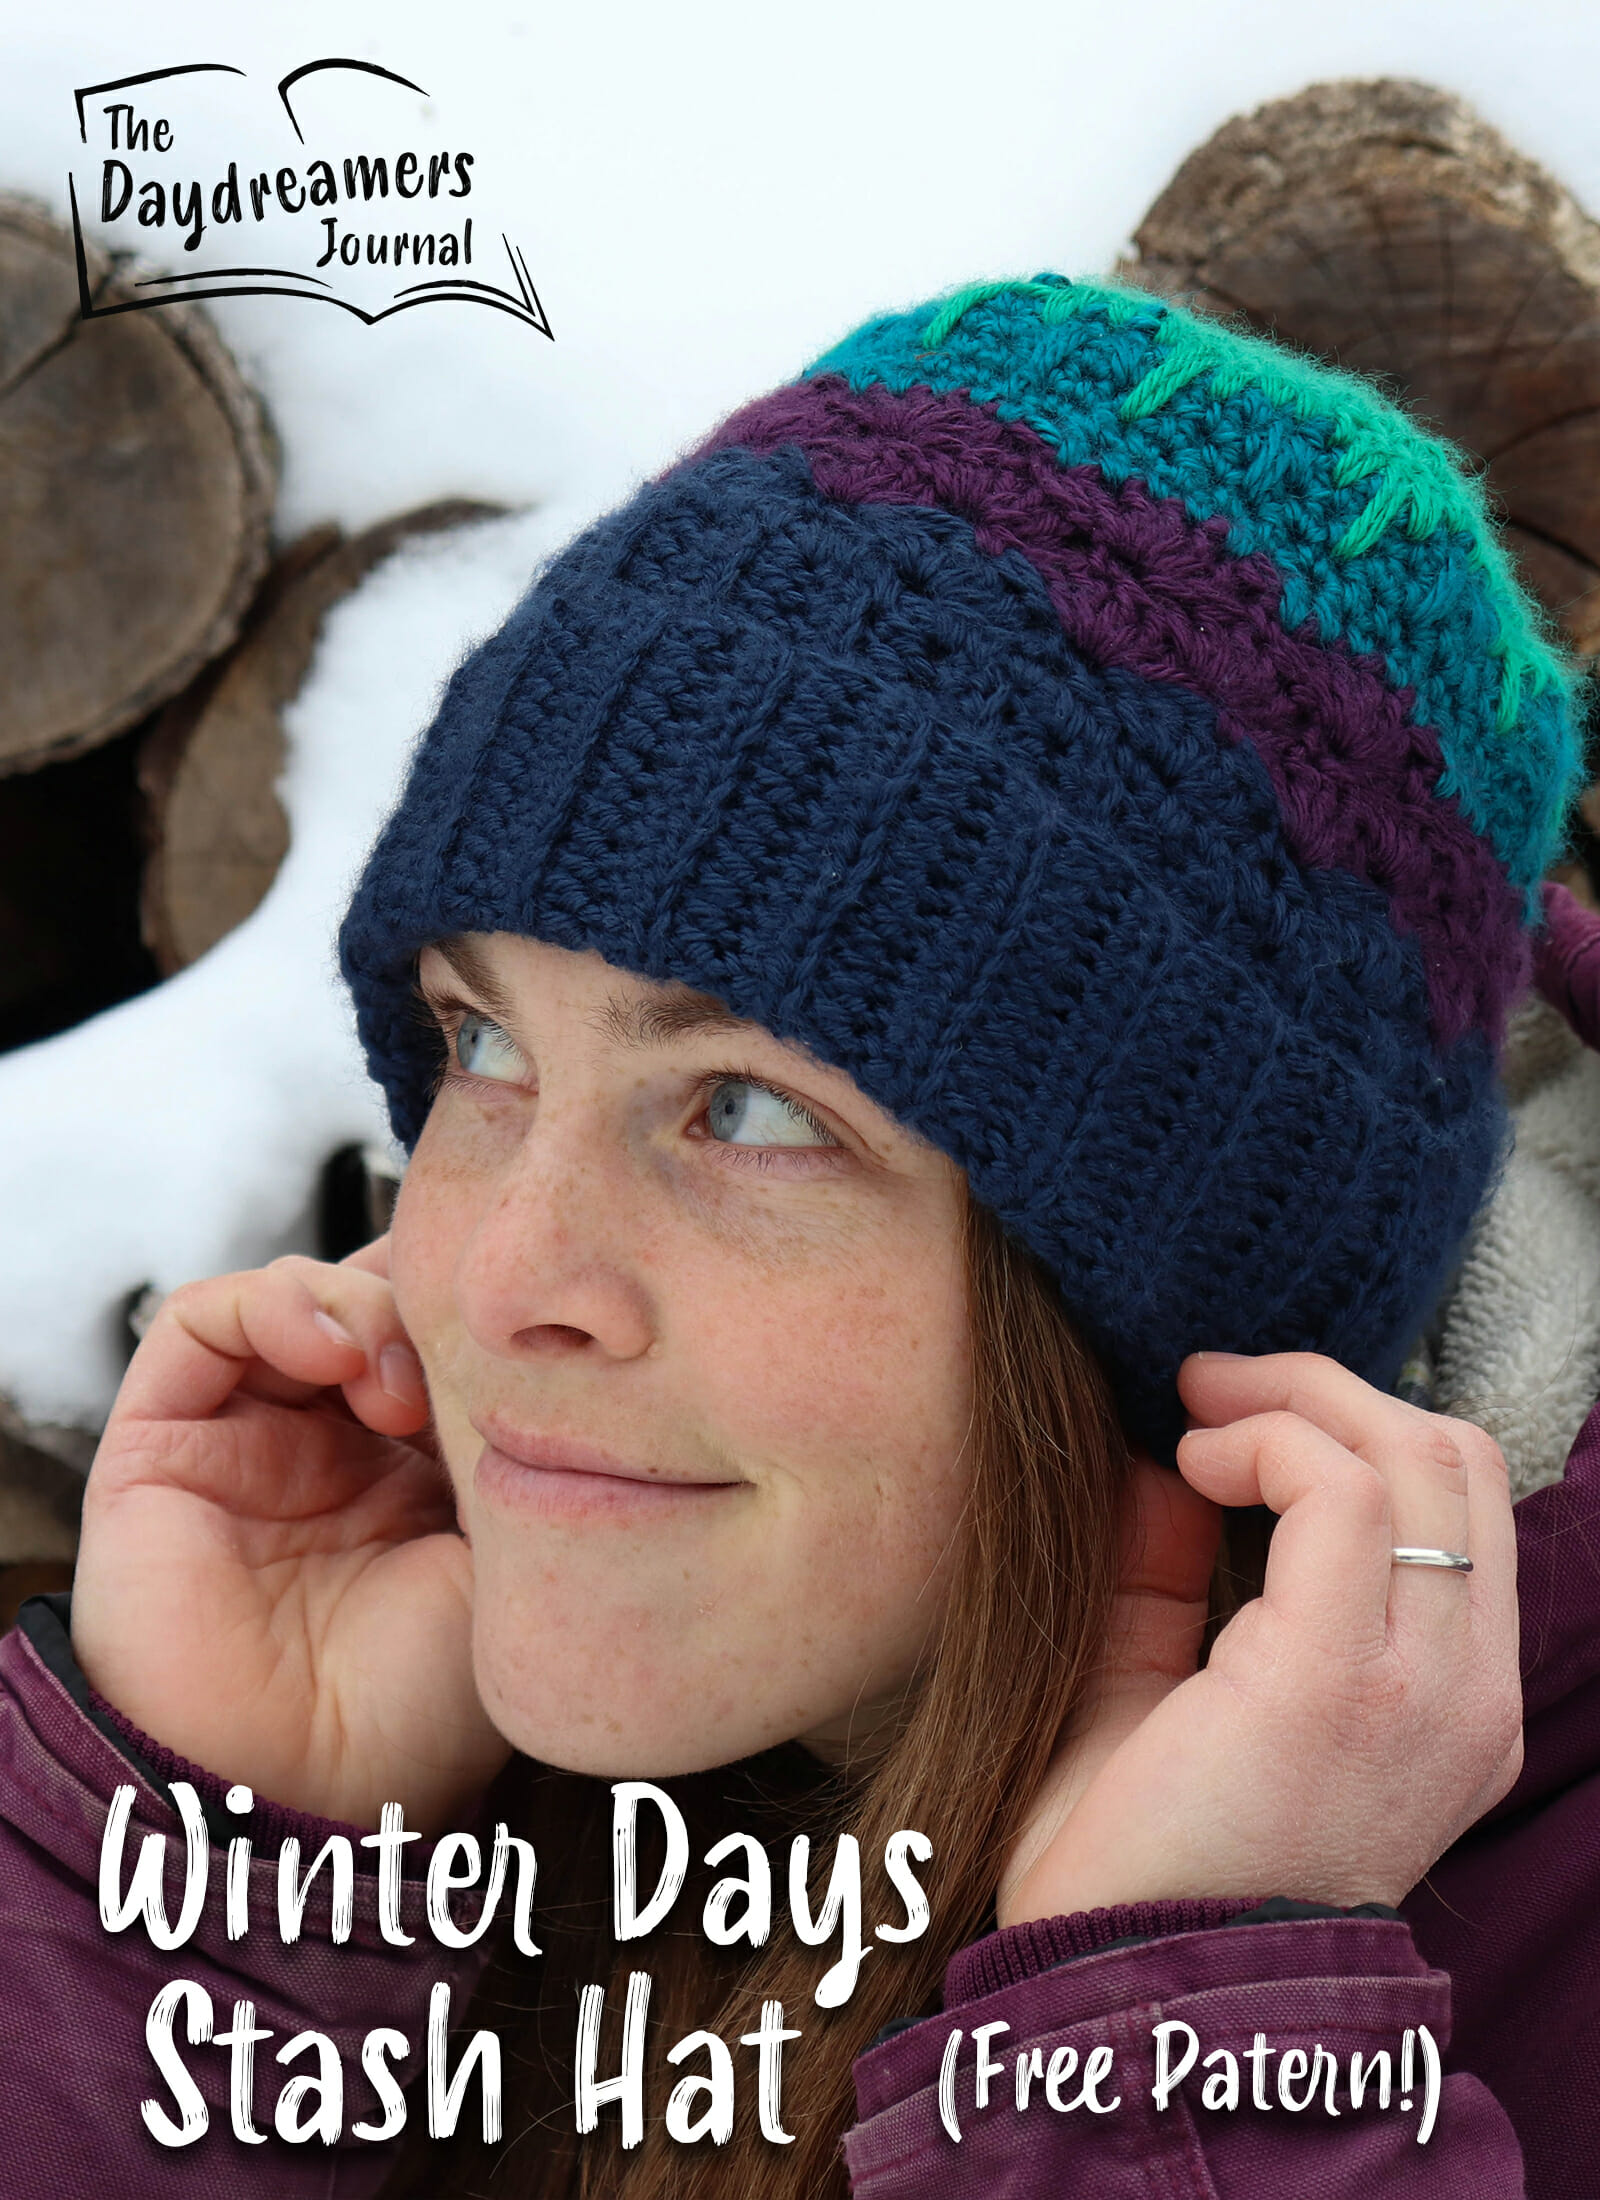
Winter Days Stash Hat
Okay, so I have a minor obsession with yarn. I like to buy it, dream about the projects I’ll make with it, and occasionally pet it affectionately. I love to find new crochet projects on Pinterest or in one of my many crochet books. But, as I make these projects, I inevitably end up with half used skeins. I buy extra yarn to make sure I’ll have enough to complete the pattern, but if I don’t need it all, then what? There is enough yarn there to make something, but I really don’t like the idea of starting a project, getting most of the way finished, and then running out of yarn. So the skeins sit there, buried in my stash.
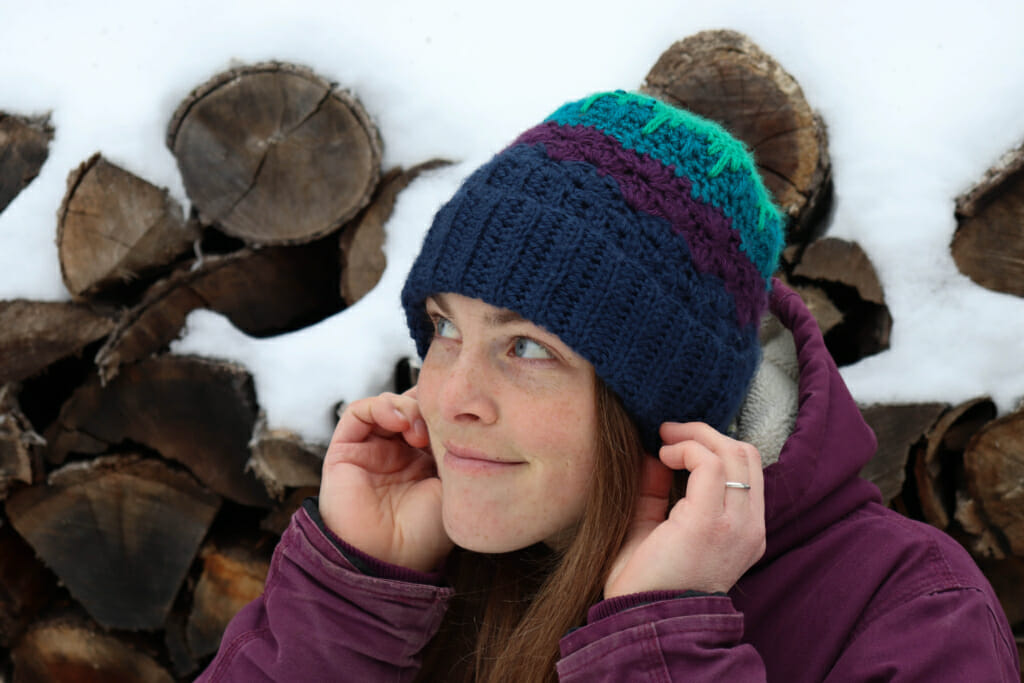
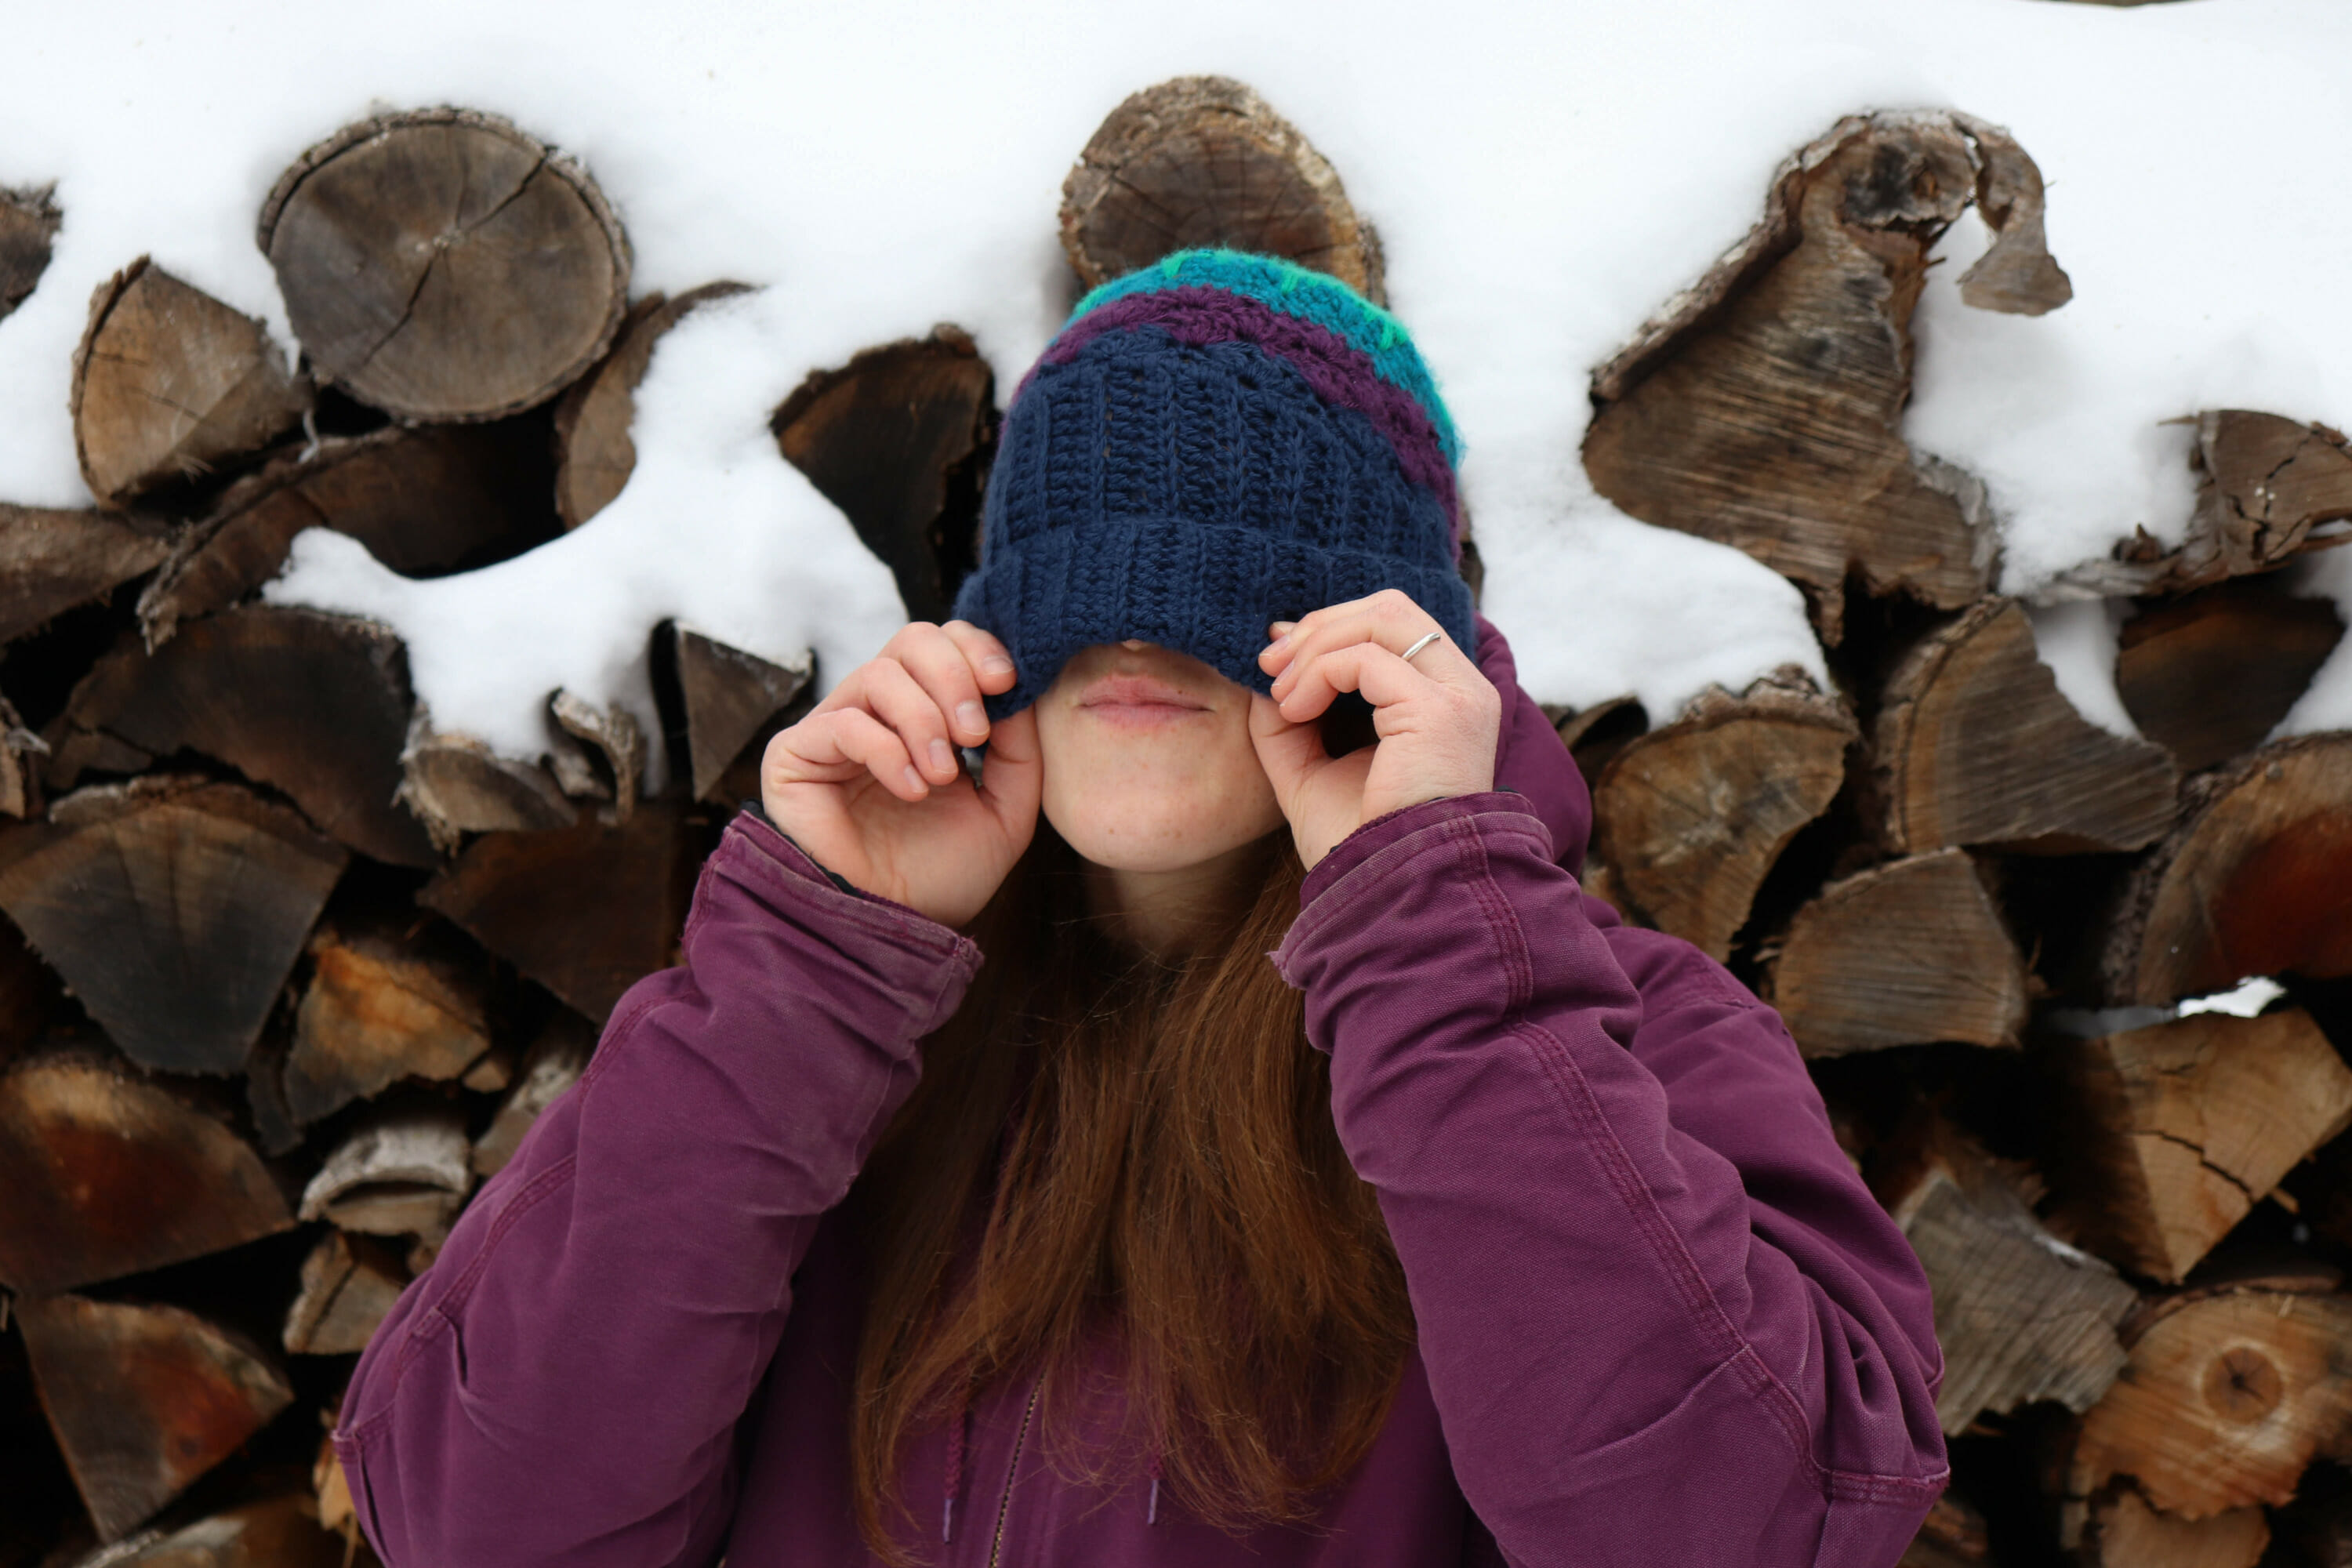
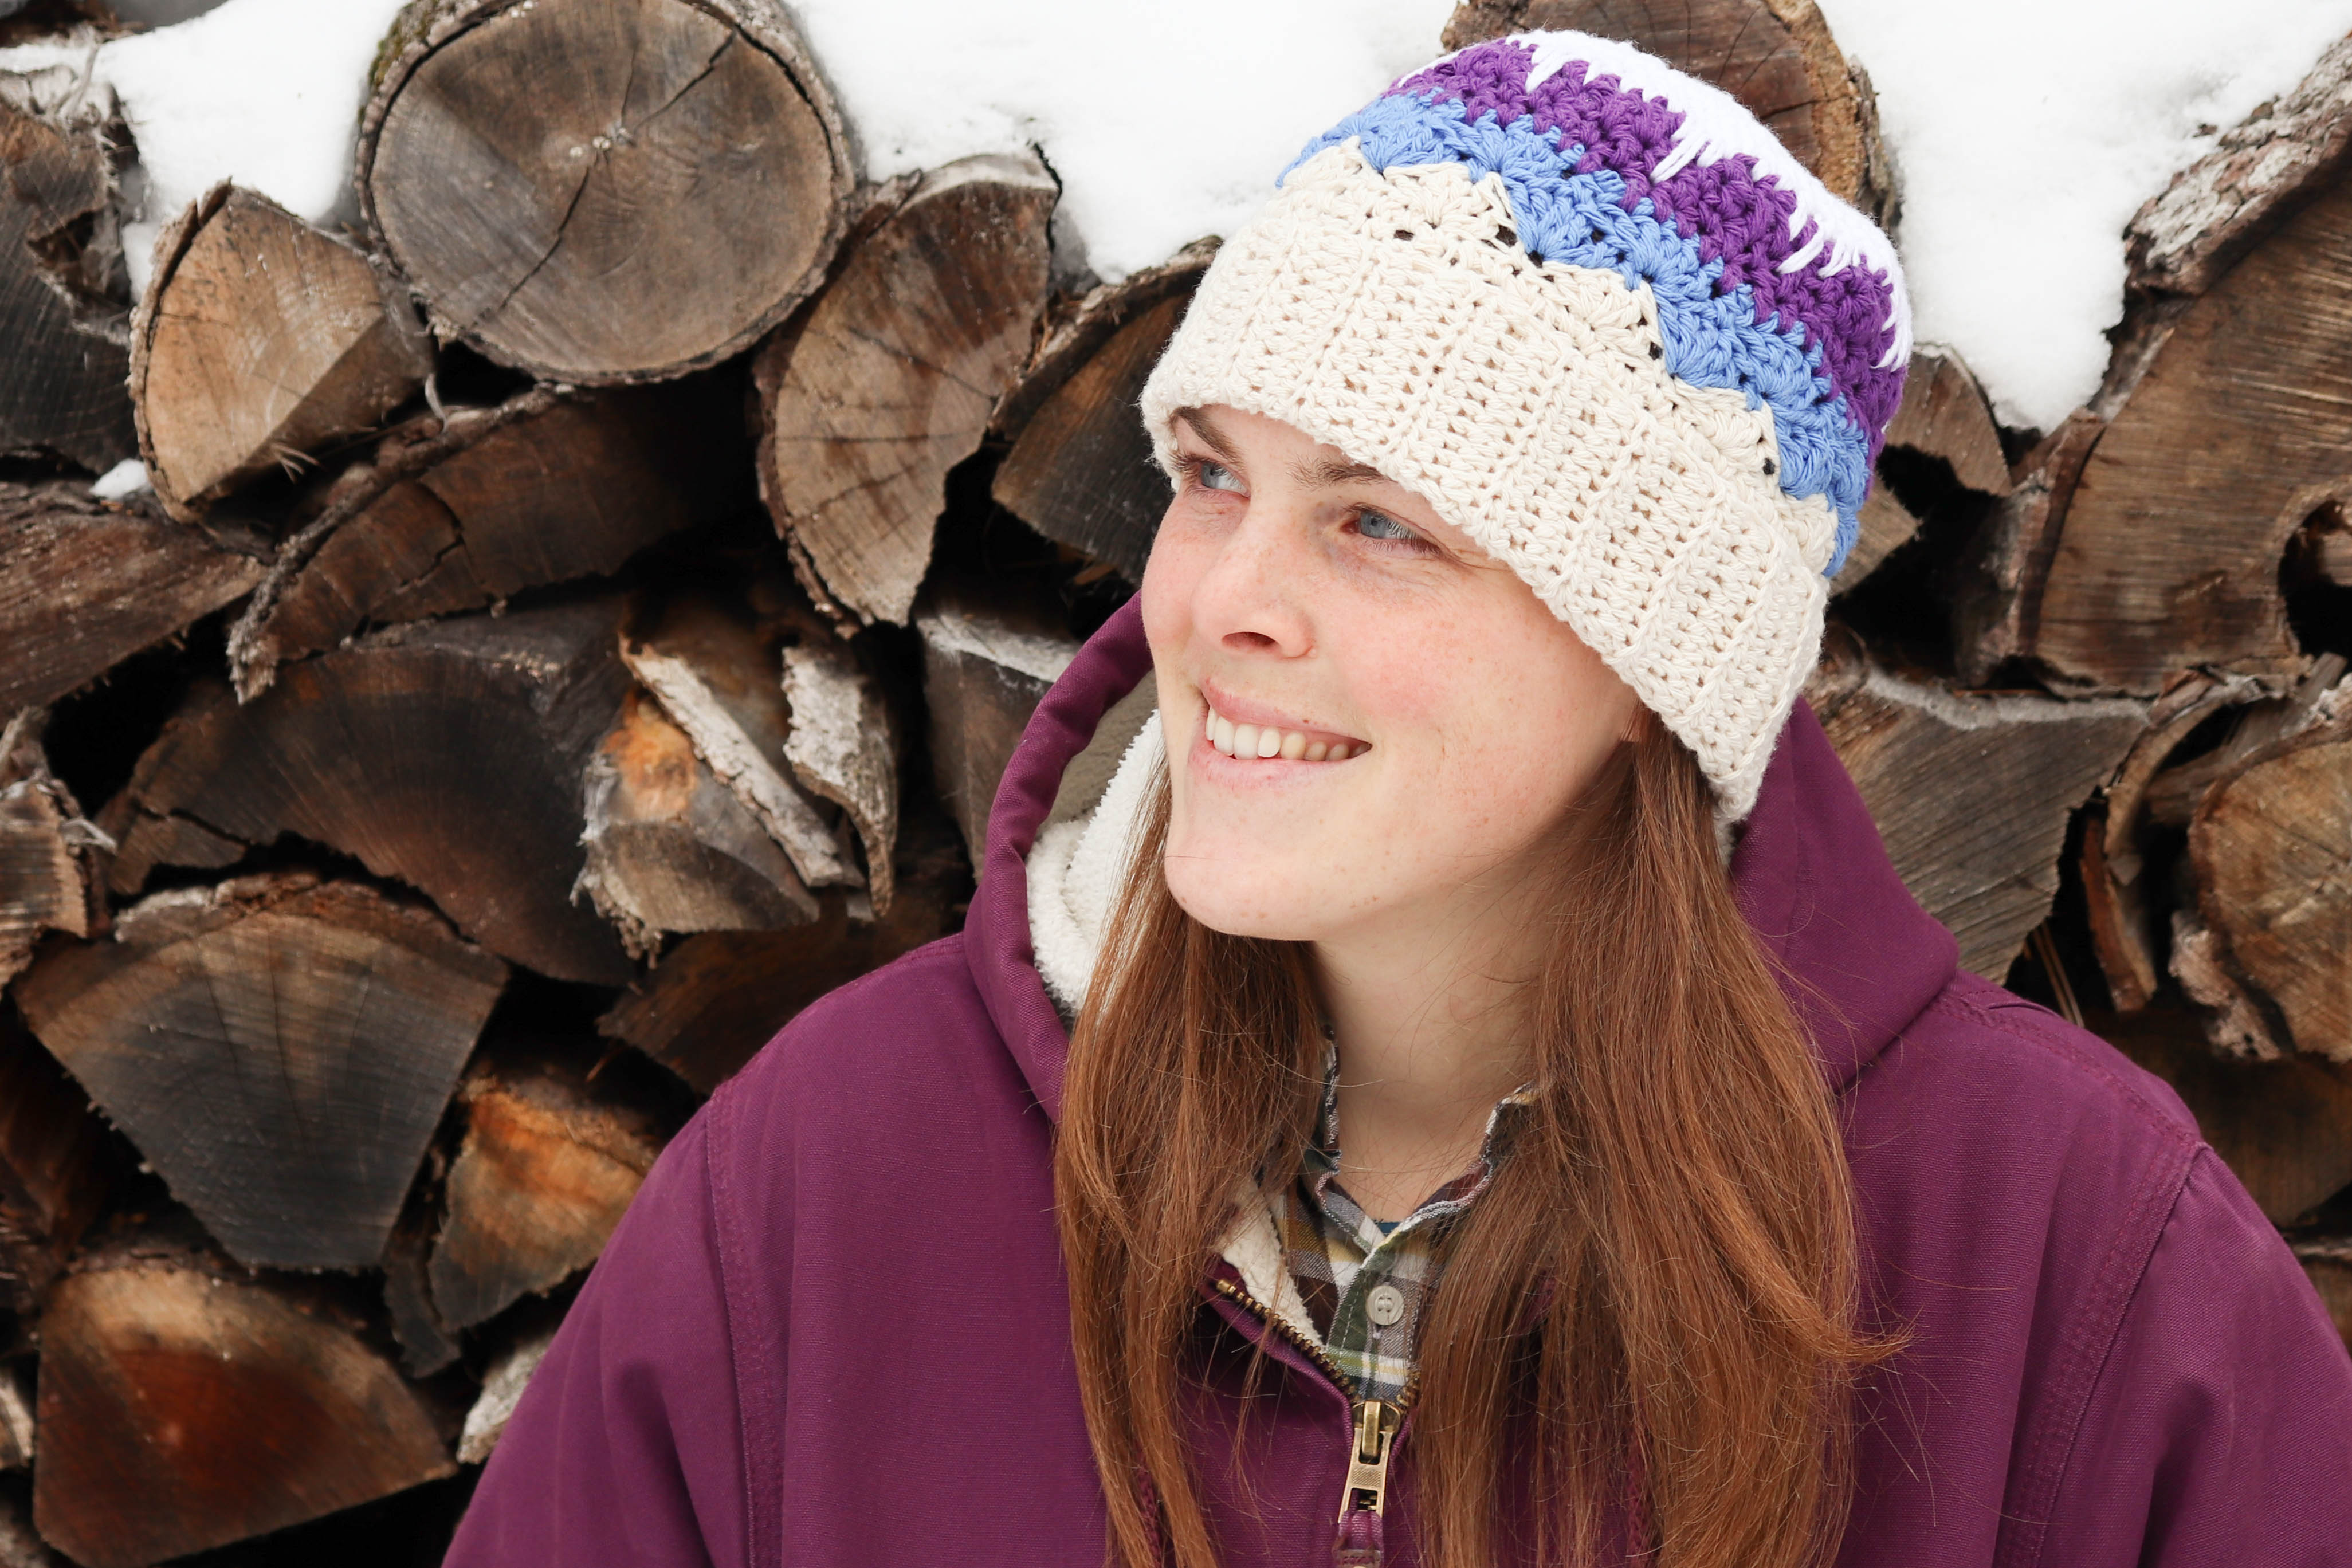
And so, I decided to make a pattern that could help me and anyone else who collects yarn. You could say this pattern is a “Collector’s Edition” because it is for all us yarn ‘collectors’ out there. 😉 Also, my husband has challenged me to use up some of my skeins of yarn before I purchase more. At least I viewed it as a challenge, because I like buying more yarn! 😛 Additionally, I really wanted to have a warm hat to wear at work (I currently work at a fruit farm and I spend a good deal of time outdoors. Winters in Pennsylvania can be on the cold side). I have many hat patterns saved on my Pinterest board and there are so many cute ones to choose from, but my problem is I was having a hard time finding a pattern that was going to keep my ears warm. So many of the patterns I like had fun stitches and neat textures, but sometimes the stitches ended up being too lacy and when the winter wind comes blowing, my poor ears were feeling the bite. So, I decided to make this hat double brimmed to keep my ears toasty warm.
This pattern utilizes many different stiches to create texture and to help the different colors blend together. This is the first pattern I have created and I was pretty happy with how it turned out. Hope you like it too!
Here is a PDF version if you want to print it out!
What you’ll need:
Size G (4.25mm) Crochet Hook
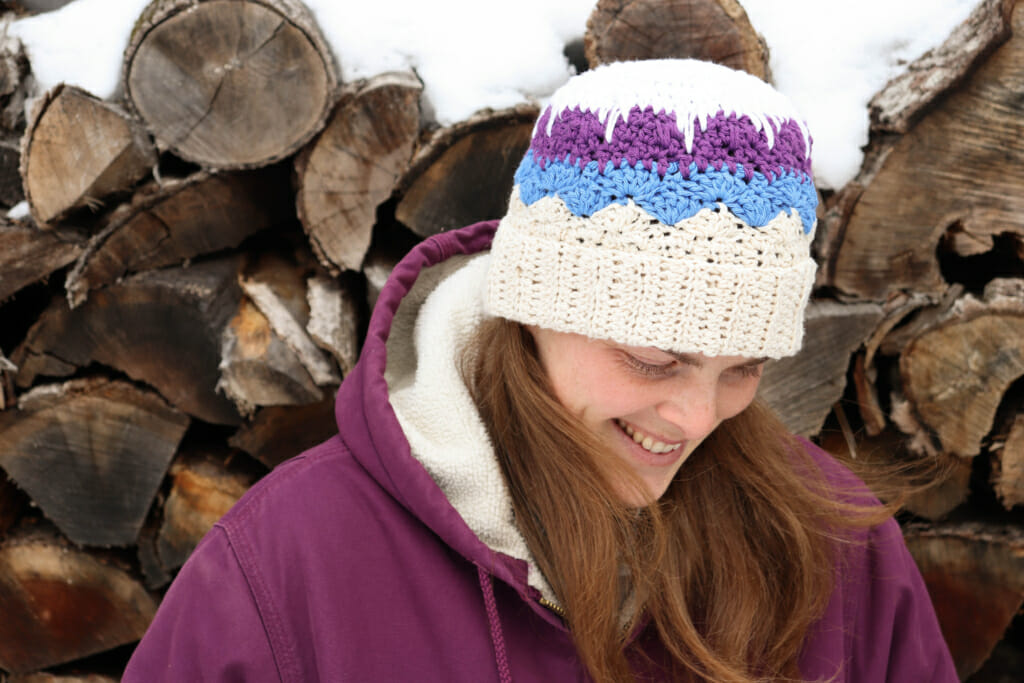
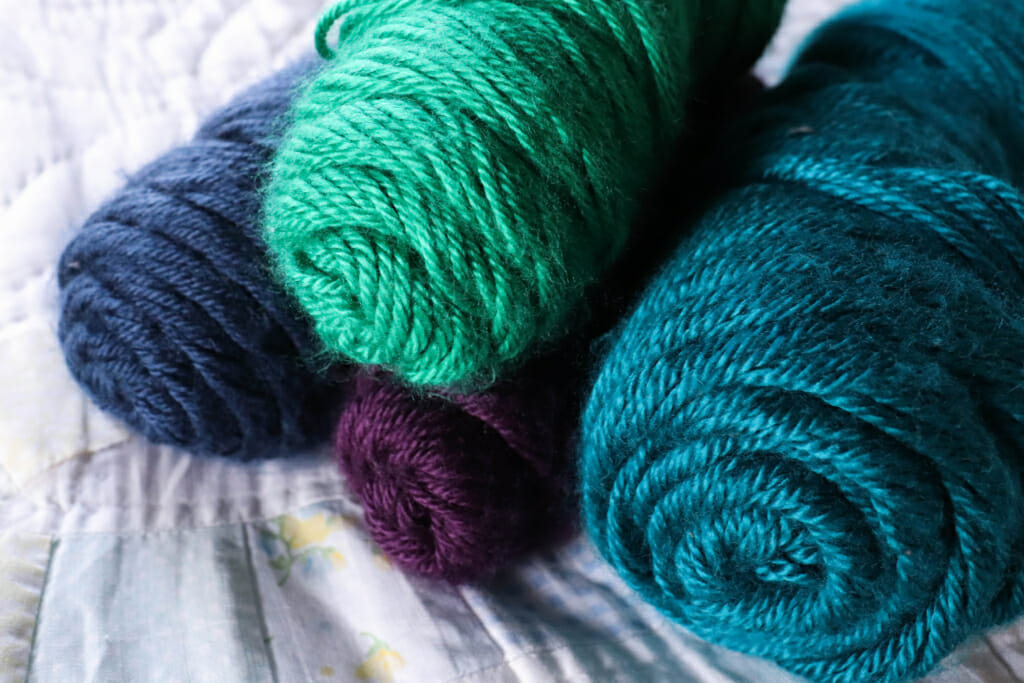
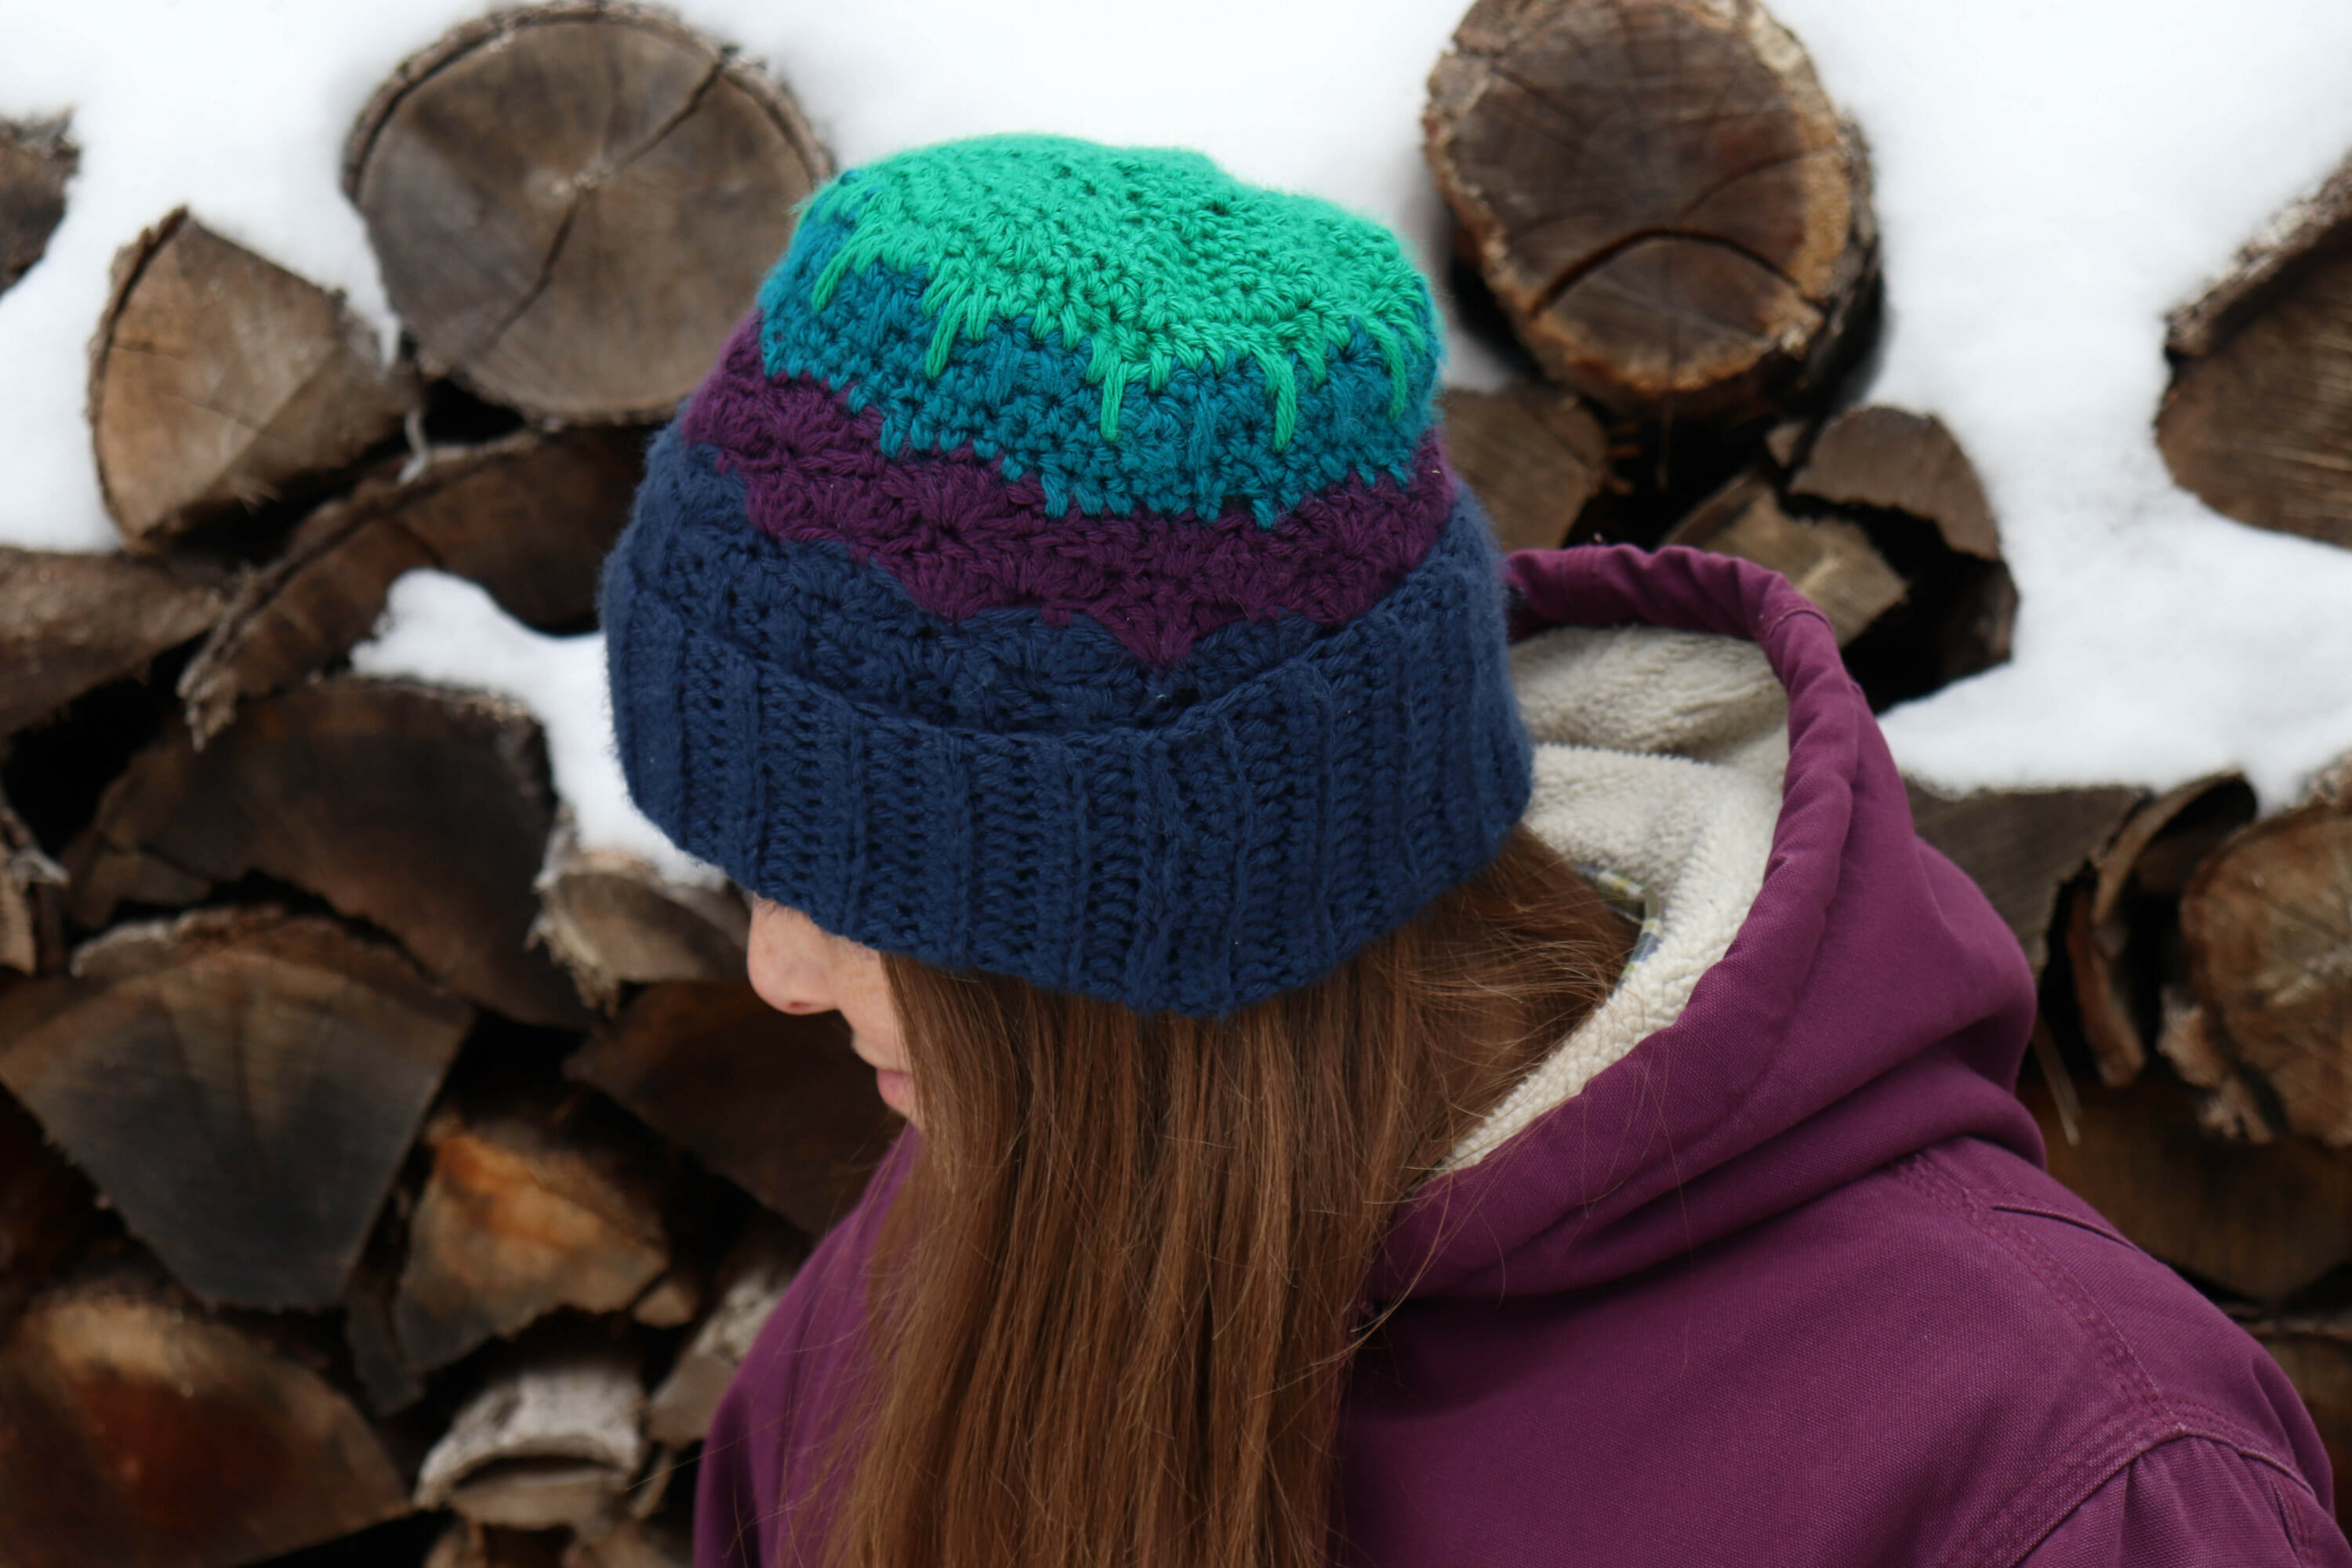
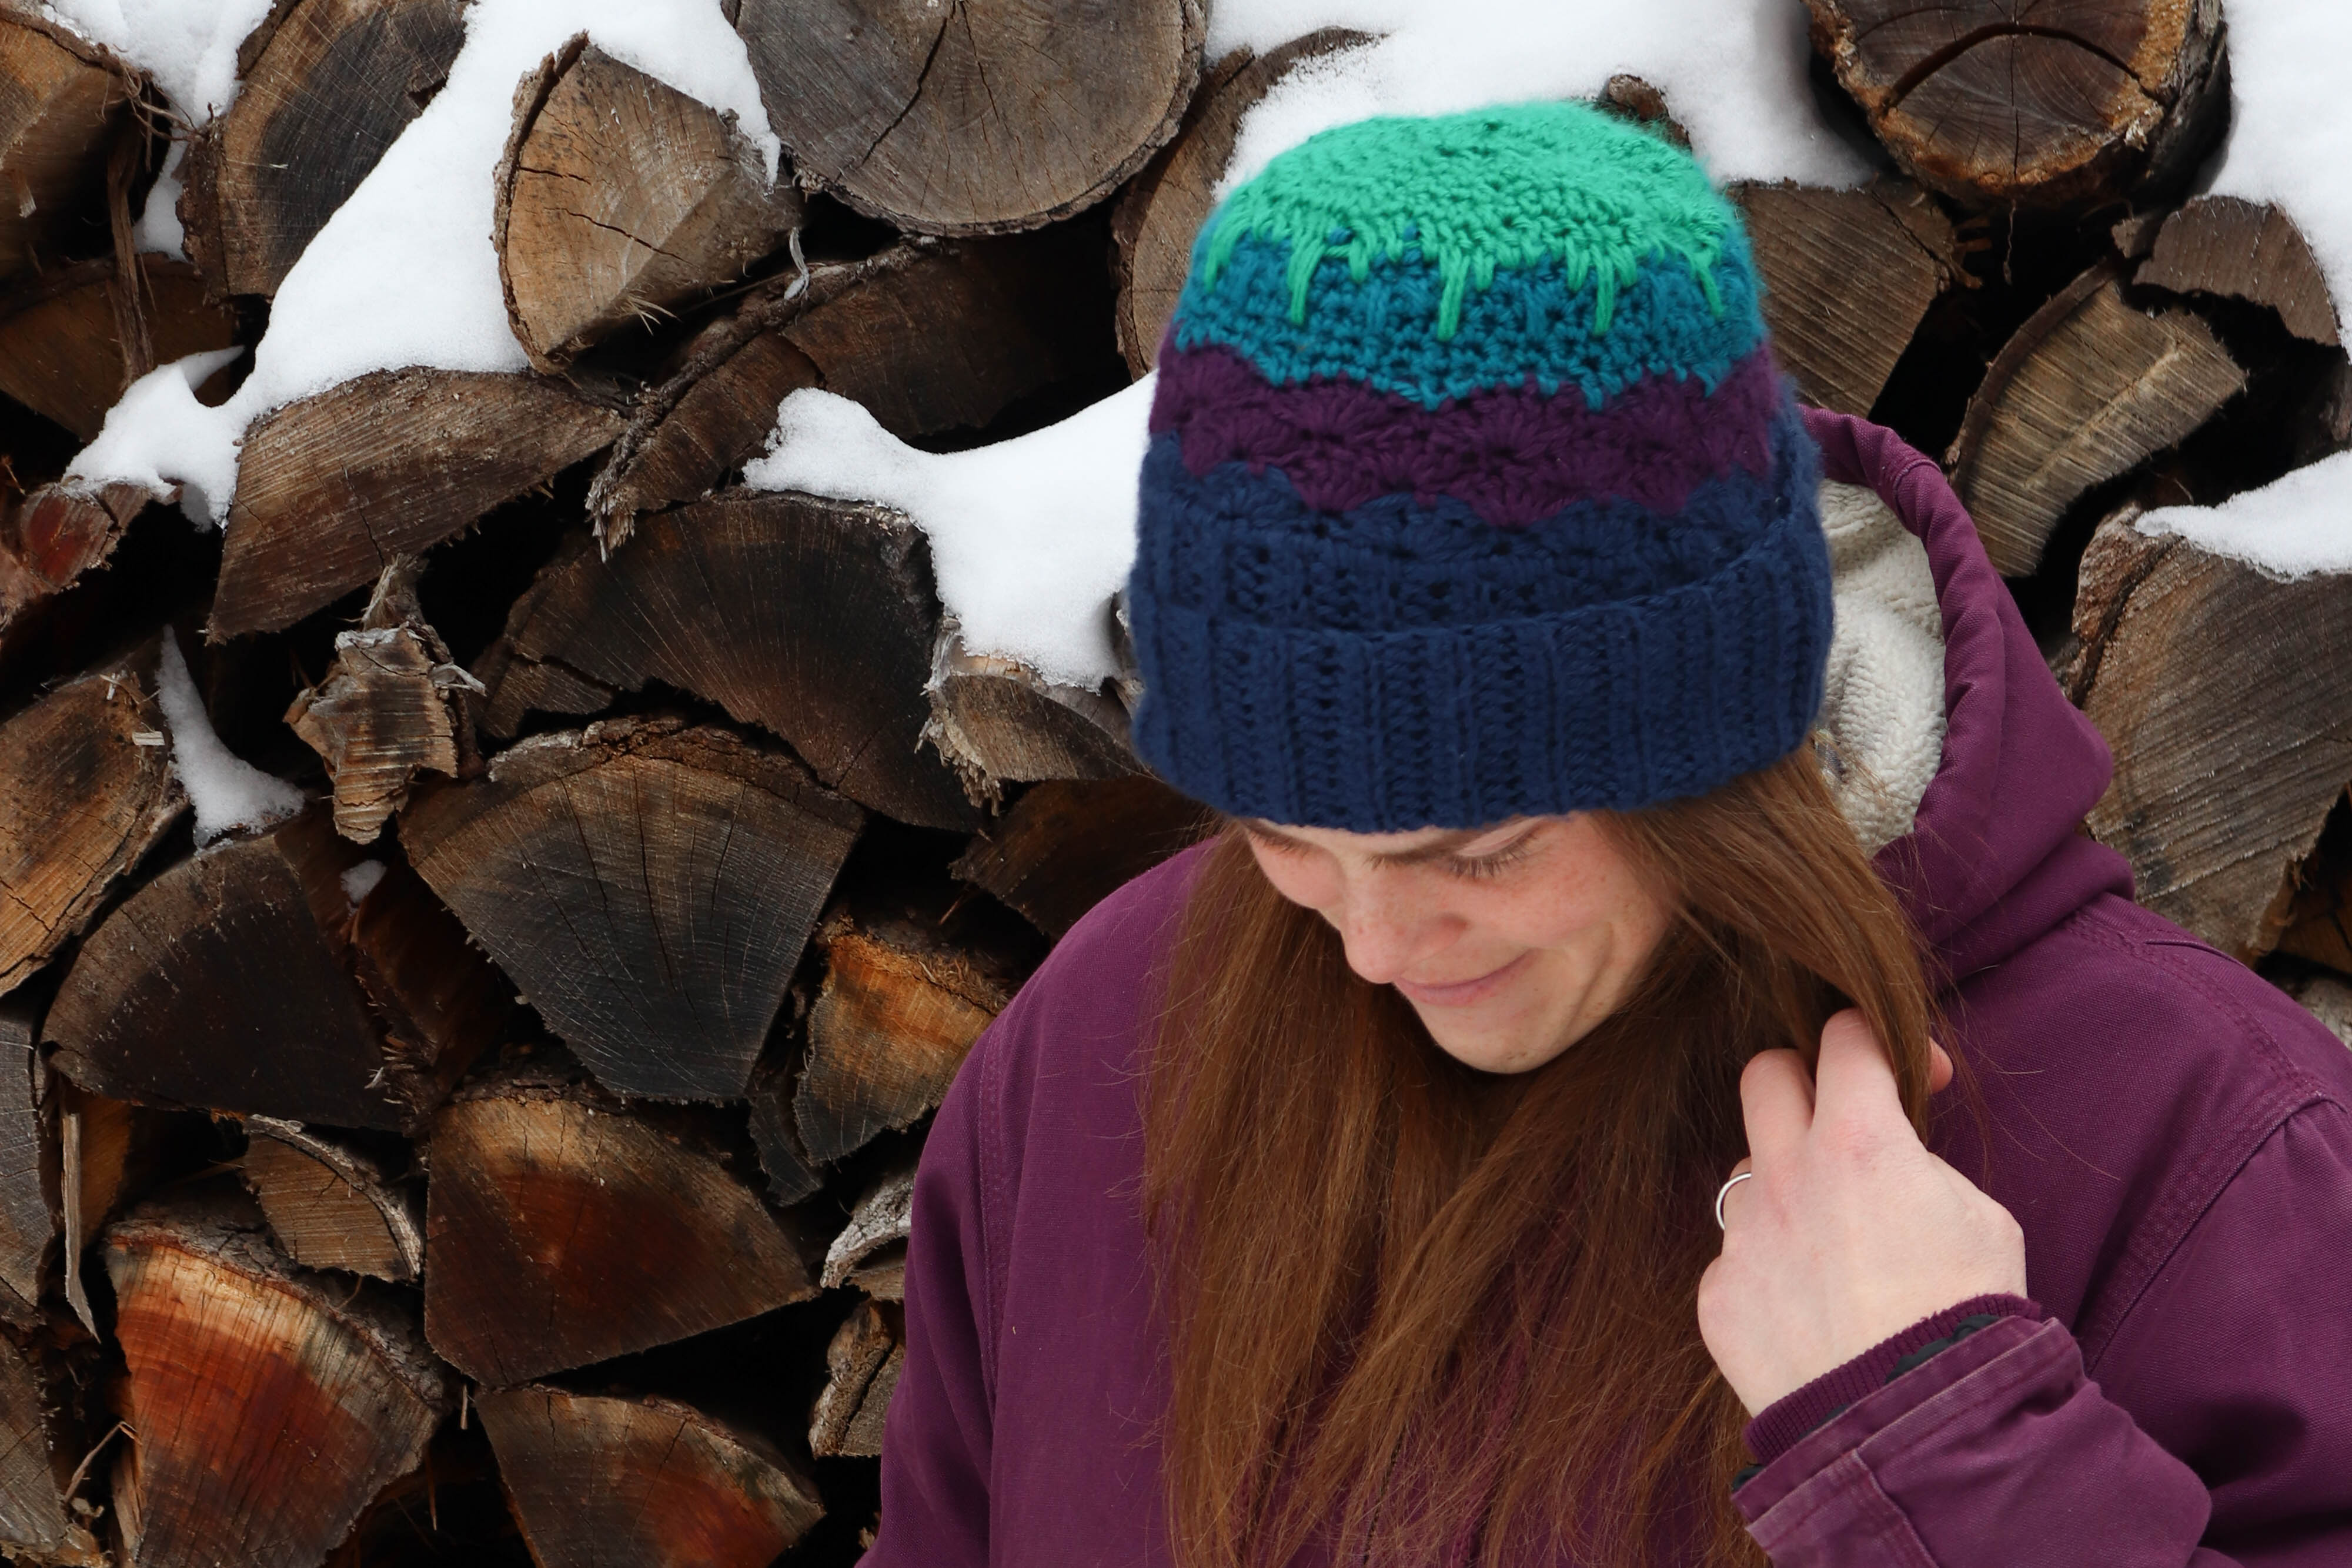
Yarn (from your left-over stash, preferably) (I used 4 colors of worsted medium weight yarn for this pattern, I used acrylic yarn for the hat with the blue brim and a cotton blend for the hat with the cream brim. Both worked very nicely, but I think the acrylic one was slightly warmer, because cotton is be more breathable. But, the cotton one is still warm and for my sensitive skin, cotton can be less itchy for me. You should be able to use whatever you have on hand!)
Yarn/tapestry needle
Scissors
Measuring tape (optional)
Stitch Marker (optional if you want to keep track of where you started your row)
Abbreviation Key:
hdc: Half-Double Crochet
dc: Double Crochet
sc: Single crochet
blo: Back loop only
sl: Slip stitch
ch: Chain
st: Stitch
sk: Skip
2tog: work two stitches together aka decreasing
blo: work the new stitch into the back loop of the stitch in the previous row (this creates more stretch in the finished material)
Directions:
Note: When I changed colors in this hat I chose to weave in my yarn ends as I continued to work the hat. In other words, I held the tail from the previous color and the tail from the new color on top of the stitches I wanted to work in. That way, as I made new stitches, the two tails were trapped inside that new stitch. You can choose to do the same or you can simply weave in your tails at the end, it is totally up to you!
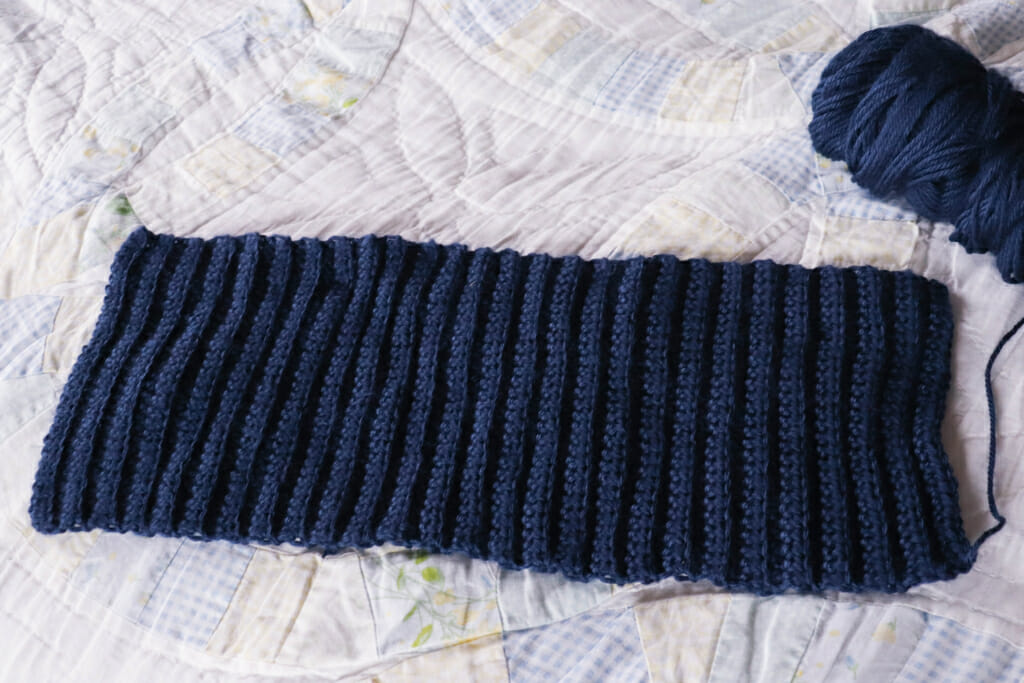
- Make a slip knot on your hook and chain 25-31 stitches. This number depends on how wide you would like your brim. The brim in this pattern is doubled over, so I recommend taking the chain folding it in half and measuring it near your ear to judge how wide you want it. As a reference the hat with the dark blue brim had 31 chains and the hat with the cream colored brim had 25.
- 1 Hdc in each chain across. Ch1, turn.
- 1 Hdc in each stich across in blo. Ch 1, turn.
- Repeat step 3 until you reach your desired length. For me this was about 19 inches.
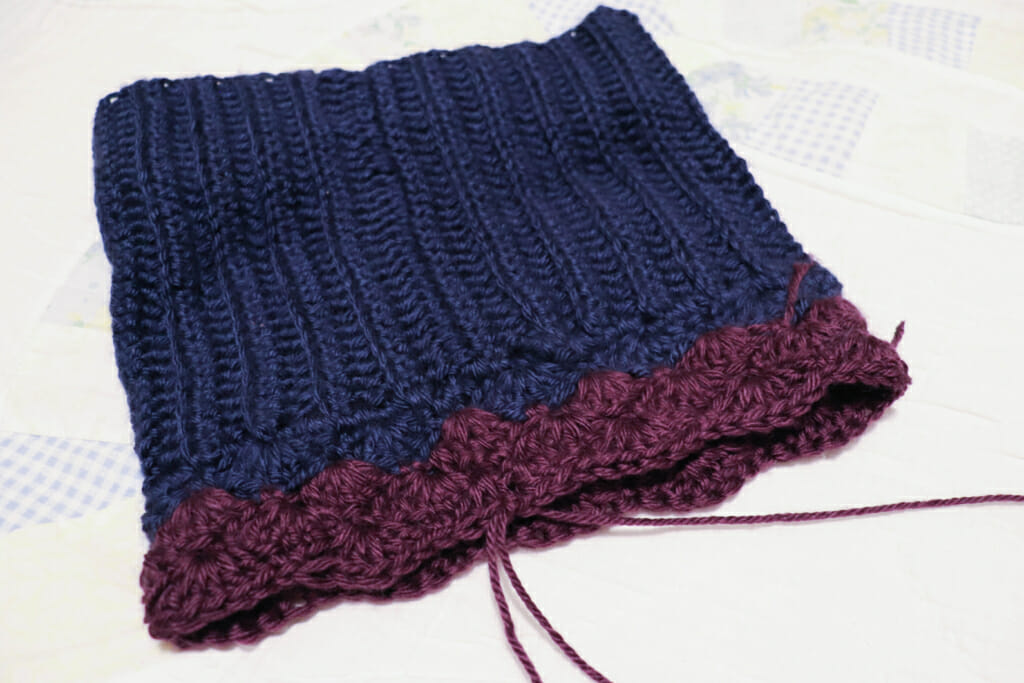
- Cut the yarn leaving a 14 inch tail. Open up the last loop that was on your hook and thread the tail through the loop to secure the row. Then using a tapestry needle and the tail, sew the short ends of the brim together.
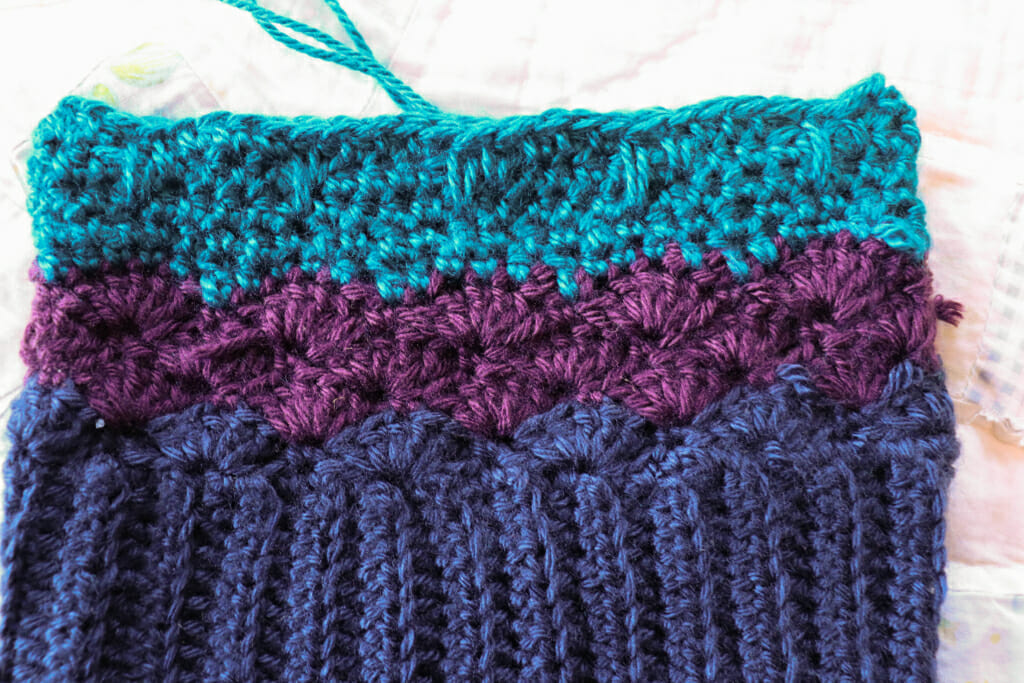
- Re-attach the same color skein of yarn to the top of the brim, ch 1 . Work 67 sc stitches evenly along the top of the brim, join with a sl st. Ch 1.
- *Sk 2 sts, work 5 dc in the next st. Sk 2 sts, 1 sc in next st.* Repeat ** around, don’t sl into ch 1. (this creates the shell stiches, here is the resource I used to learn this stitch, I just altered it to use it for a hat instead of horizontal rows.)
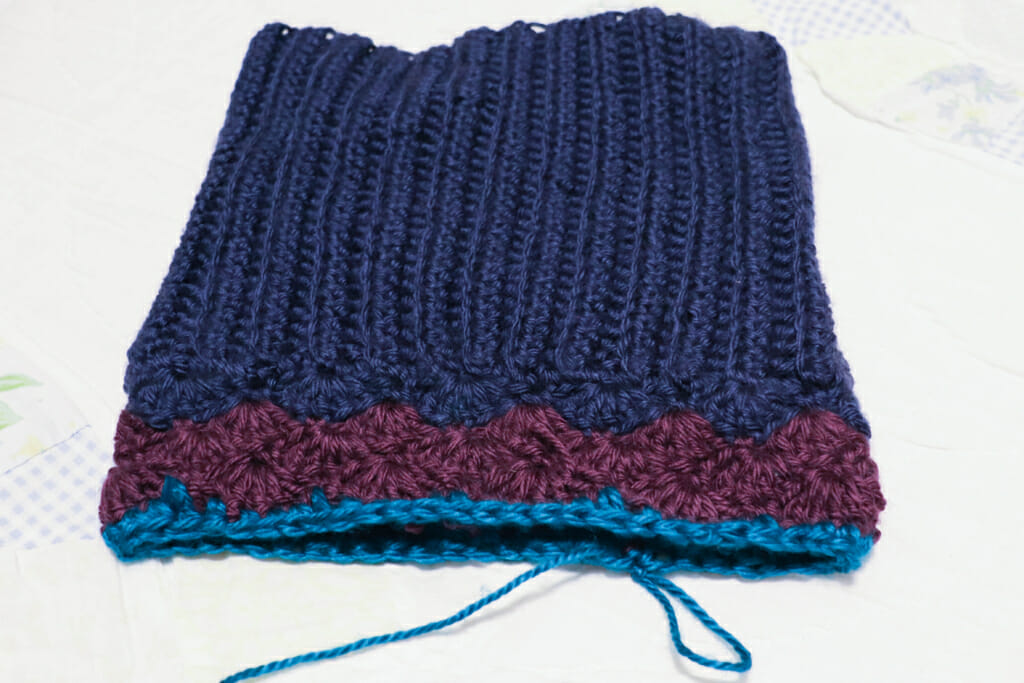
- Change yarn color. Ch 2, work 2 dc in the next st. Sk 2, 1 sc in next st, sk 2, work 5 dc in next st. *Sk 2 st, 1 sc in next stitch, sk 2, work 5 dc in next st.* Repeat ** around. At the end work 2 dc in the same stich as first 2 dc. Sl st to join. Ch 1.
- Sc in same st, *sk 2 st, work 5 dc in next st. Sk 2 st, 1 sc in next st.* Repeat ** around. Join with sl.
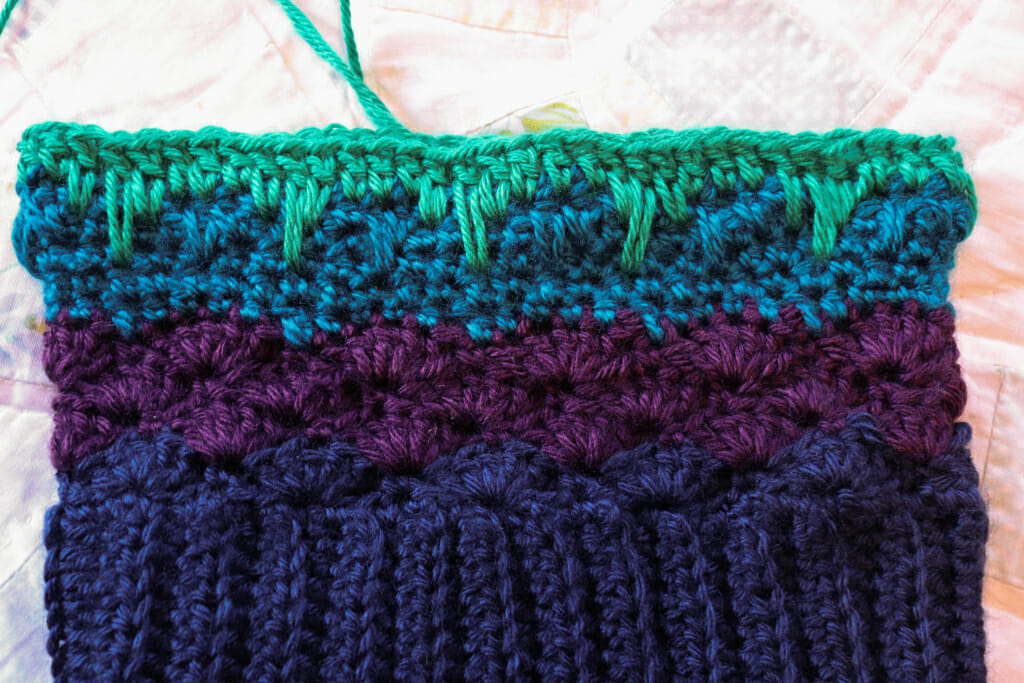
- Change yarn color. Ch 2, *1 hdc in next stitch, 1 sc in next 2 st, 1 hdc in next st, 1 dc in next st, sk 1* repeat ** around. Join with sl. Ch 2. (this row fills in the area around the shells in the previous row)
- 1 Sc in next st, 1 dc in next st. Alternate sc and dc around sk last st, sl to join. Ch 1.
- 1 Hdc in each st around, sl to join. Ch 2.
- 1 Hdc spike stitch 1 row below, 1 hdc spike stitch 2 rows below, *1 hdc in next 3 stitches, 1 hdc spike stitch 1 row below, 1 hdc 2 rows below* repeat ** around. At the last 3 st 1 hdc spike stitch 1 row below, 1 hdc spike stitch 2 rows below, 1 hdc in last st, join with sl. (Here is a tutorial I used to learn the spike stitch.)
- Change yarn color, Ch 2, work 1 dc spike st 3 rows below, 1 dc spike st 2 rows below, 1 dc in next 3 sts. *1 dc spike st 2 rows below, 1 dc spike st 3 rows below, 1 dc spike st 2 rows below, 1 dc in next 3 sts.* repeat ** around. At last 4 sts work 1 dc in next 3 sts, 1 dc spike st 2 rows below in last stitch, join with sl. Ch 2. (deciding where to work the spike sts into can be a little challenging. I tried to line up my longest spike stitch to rest in-between the purple shells in the previous row.)
- 1 hdc in next 3 st, hdc 2tog, *1 hdc in next 4 st, hdc 2tog* repeat ** around. At last 4 sts, 1 hdc in each st, join with sl. Ch 1.
- *1 sc in next 3 sts, sc 2tog.* repeat ** around. Join with sl. Ch 1.
- Work 1 sc in each st around, join with sl. Ch 1.
- *Work 1 sc in next st, sc 2tog,* repeat ** around, join with sl. Ch 1.
- Sc 2tog around, Join with sl. Ch 1.
- Sc in each st around, Join with sl. Ch 1.
- Sc 2tog around. Join with sl.
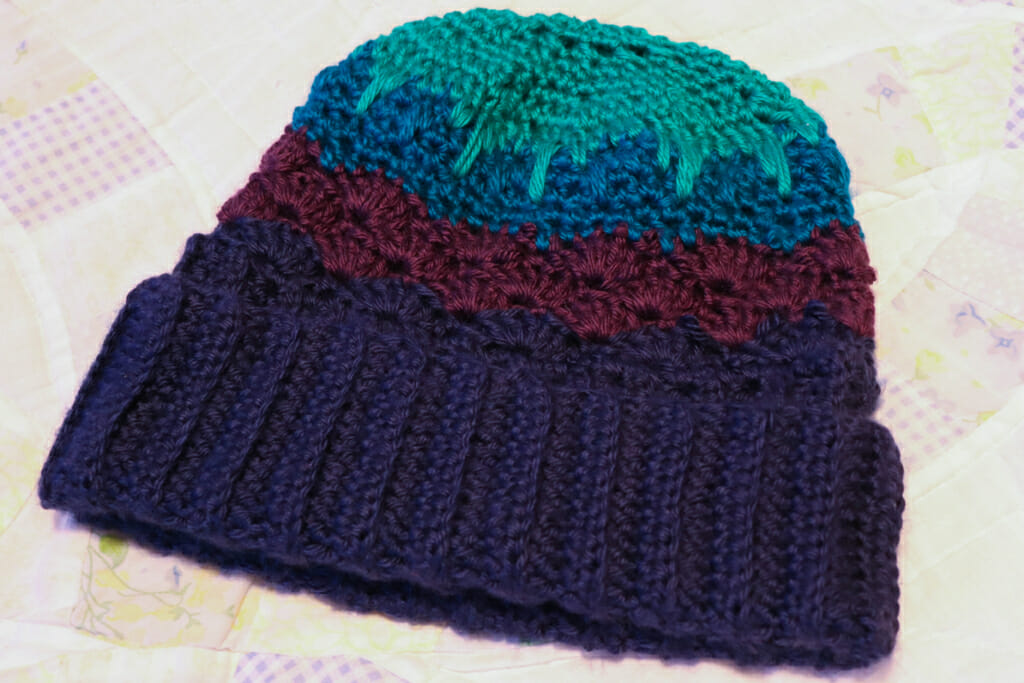
- Cut yarn leaving a 12 inch tail. Open up the last loop that was on your hook and thread the tail through the loop to secure the row. With a tapestry needle use the tail to sew up the hole in the top of the hat. Weave in any loose ends and cut off any excess yarn. And tada! A new hat that is fun and functional. Now give yourself a pat on the back for using up some of those half used skeins of yarn from your stash!
Hope you enjoyed this pattern!
- Written By Danielle D.